











Create and Manage Approval Requests Directly in Microsoft Word
Key Takeaways:
- Streamline Document reviews with MS Word’s approval feature
- Easy way to get documents ppproved without leaving Microsoft Word
- Add-ins feature available for Microsoft 365 subscribers
- Helps to make collaborations transparent
Let’s discuss, Create and Manage Approval Requests Directly in Microsoft Word. This add-in feature enables users to create and manage approval requests for a Word Document, enhancing the user experience. The Add-in feature in Microsoft Word is available for all Microsoft 365 subscribers using an F1 (Frontline worker) license and above (which also includes EDU and Enterprise licenses). This new feature helps users increase their productivity.
Table of Contents
Table of Contents
What are the Advantages of Approval Add-Ins in MS Word?

Approval Add-Ins MS Word is a great feature developed by Microsoft for users. This feature enhances users capability in MS Word. The following are the Advantages of Approval Add-Ins in MS Word.
1. Efficient Approval Process in Word
2. Helps to track approval requests related to a specific topic
3. Easy to identify approved and rejected approvals
4. Helps to make collaborations transparent.
Create and Manage Approval Requests Directly in Microsoft Word
This new feature also improves users’ capabilities in Microsoft Word. The great thing is that the add-ins can be used on MS Word without leaving the MS Word app. As mentioned, the add-in feature helps Microsoft 365 users accept approval requests. The approval app used in Microsoft Teams usually helps users attach file links when creating approval requests.
However, the approvals aren’t currently attached to the Word Document. The Approval add-in MS Word allows users to get a direct entry point to create approval requests for specific documents they are working on.
| Different Scenarios to Try Approval Add-Ins |
|---|
| Allows to create an approval request for a document |
| Helps to Approve or reject a document approval request. |
| As a team owner, create a template for your team to use when submitting a document for approval. |
- Organizational Messages Now Available on Microsoft 365 Admin Center
- Microsoft Introducing Multi-Tenant Organization Capabilities in Microsoft 365
- Copilot is in All Microsoft 365 Apps
How to Work Approval Add-Ins
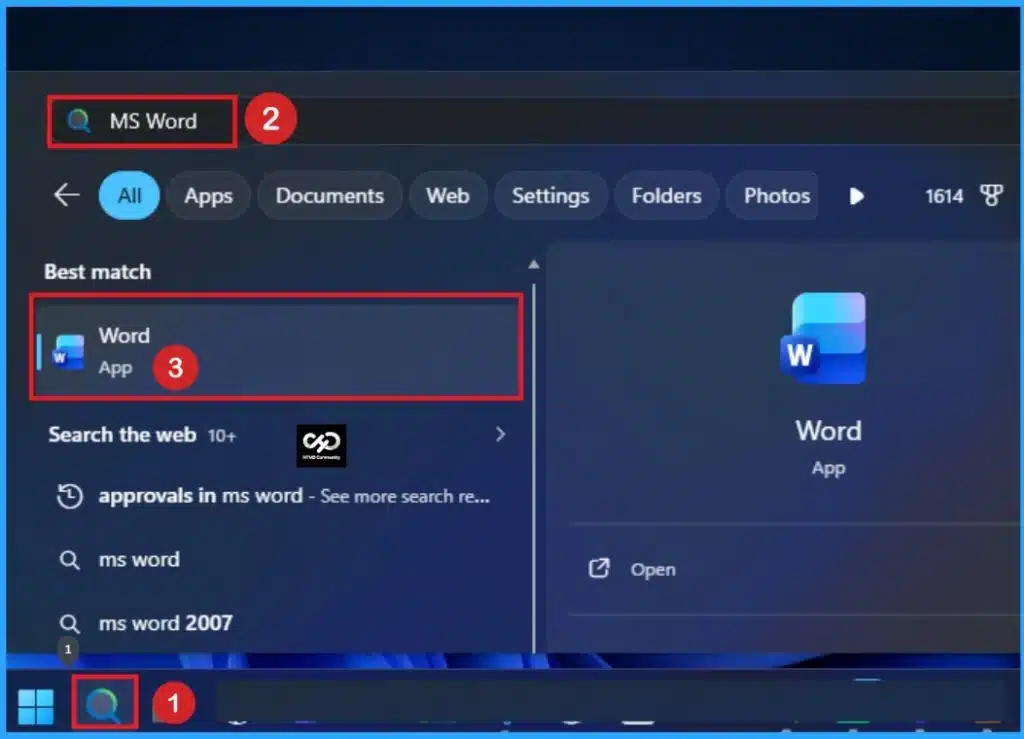
Let’s check, how to work Approval Add-Ins on MS Word. Users can easily create Approval Add-Ins in MS Word. Click on the Search button on your device and search for MS word. Then Open the MS Word.
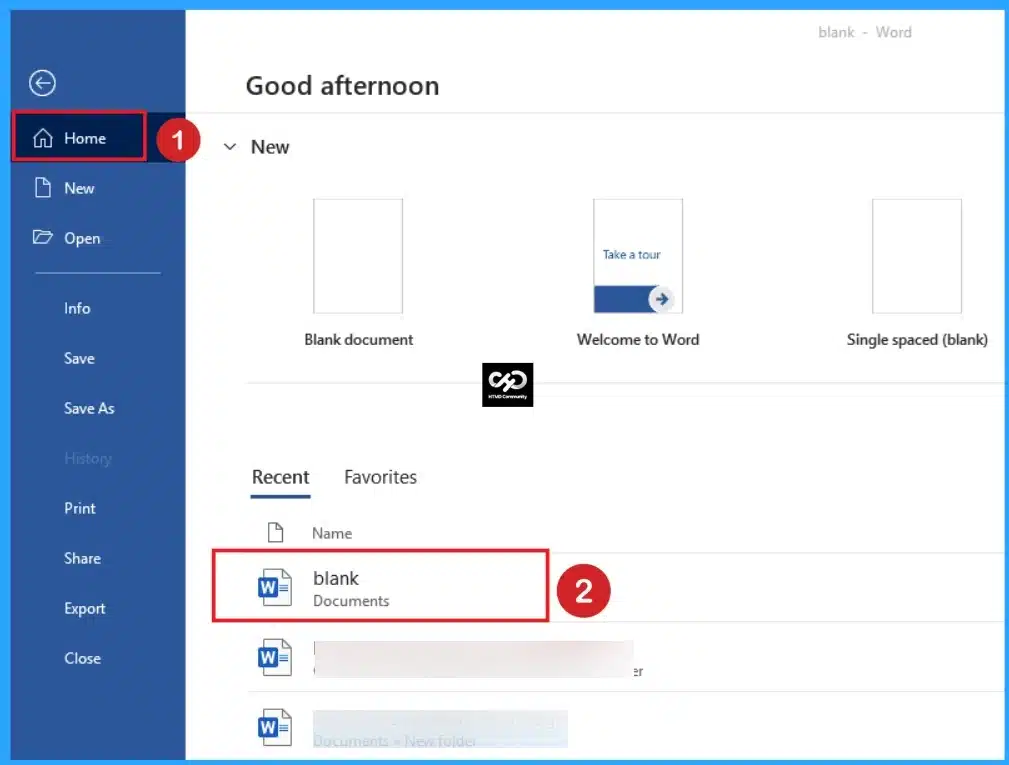
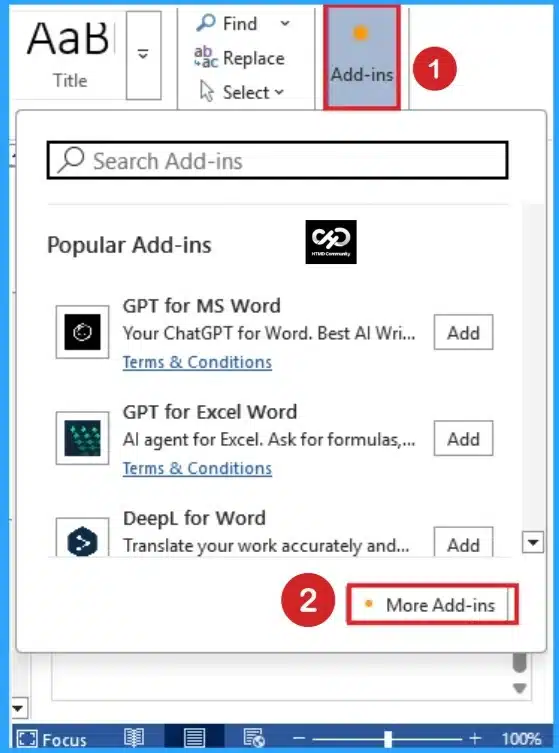
Select the Home tab on the MS word and open a blank document then you can locate the Add-ins section. Look at the below screenshot. You can also find Add-ins from other MS documents.
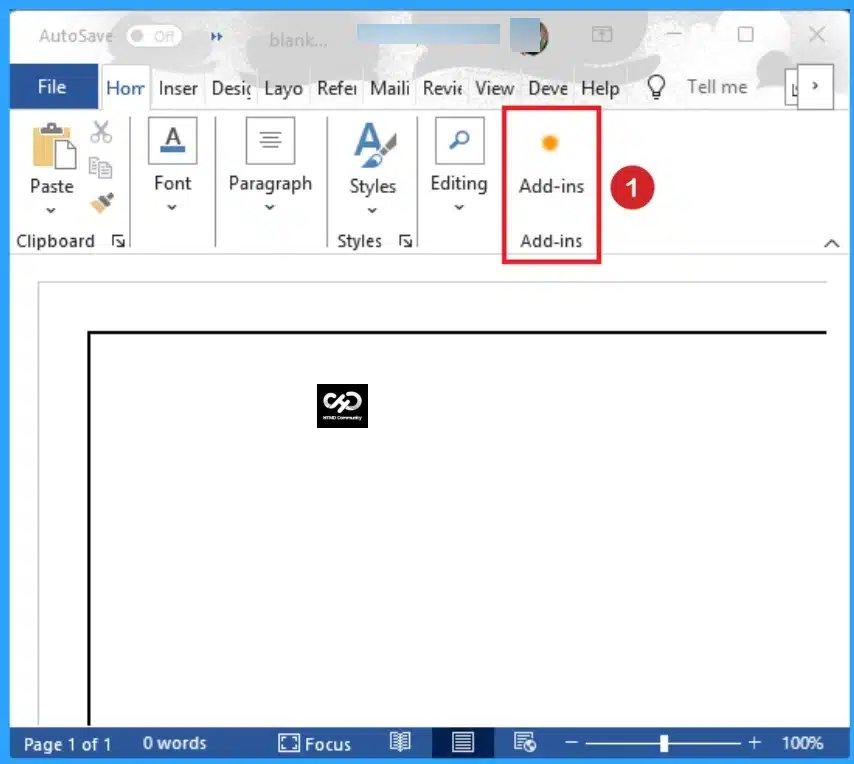
In the MS Word document you can see the Add-ins option on the File Tab. To access the Approvals features you can simply click on the Add-ins button.
After clicking on the Add-ins button a new window will shows different types of Add-ins. From this window click on the More Add-ins option. Look at the below screenshot.
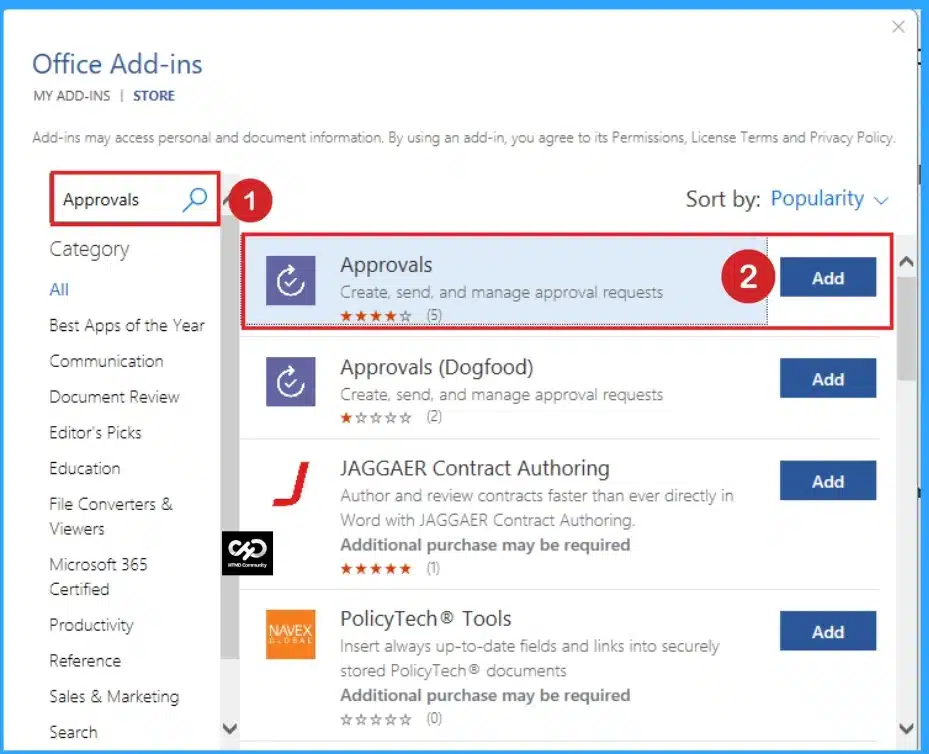
After clicking on the More Add-ins you will got Office Add-ins. On the search bar, search for Approvals. Then you can see many Approvals Add-ins. Here I choose first one.
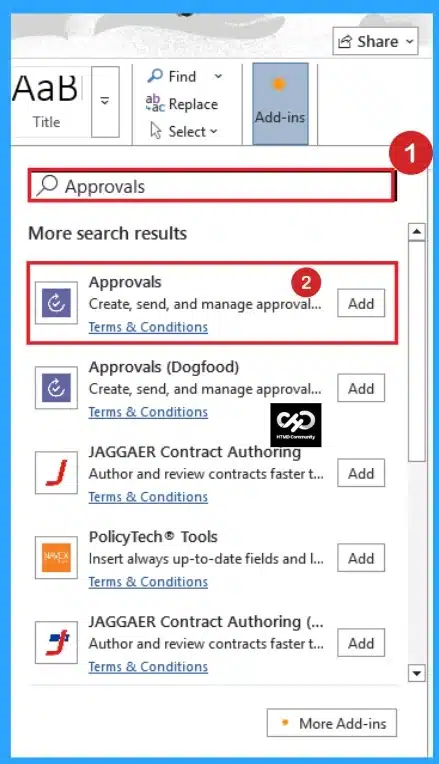
Or you can easily find the Approvals by searching the Approvals in search bar simply without going to More add-ind options. Then open the Approvals.
With Approvals in Microsoft Word, you can create requests for entire documents or a specific section within one and share it with recipients all in one place. You can keep track of progress by viewing the document’s version history. When you need to review a request, you can easily approve it or complete other actions directly in the document.
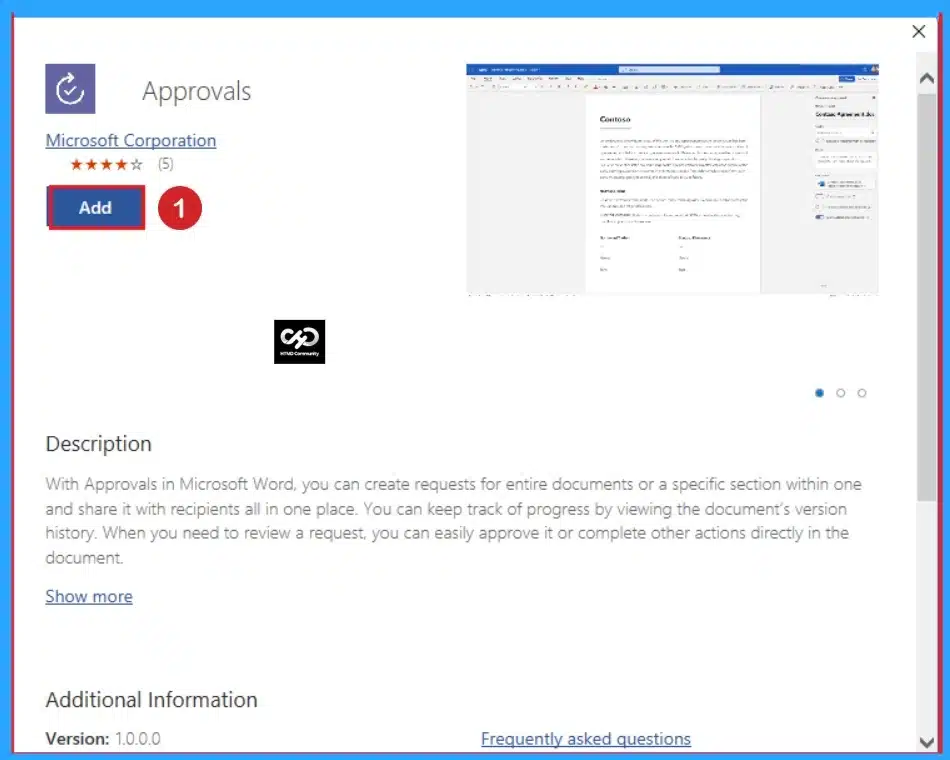
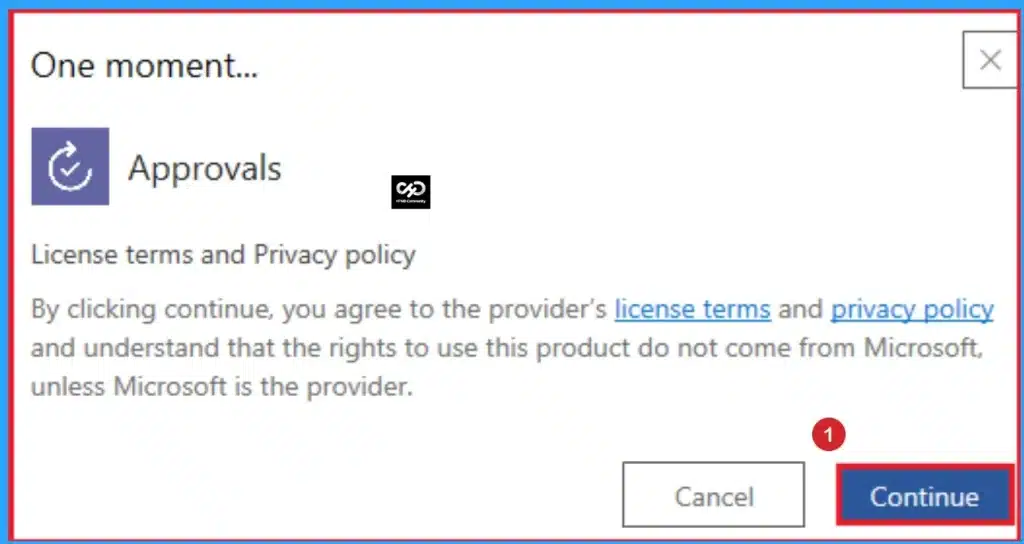
After that, In the search bar, you can search Approvals. On the Approval page click on the Add button and then, when prompted to accept the license terms and privacy policy, click the Continue button.
After creating the request in Word, select the New Approval Request button in the Approvals pane. You can choose to create a basic request or use a template that your team created. After completing the required details, click the Send button.
To respond to a request easily, click the request in the Approval history section. Then, users can select the Approve or Reject button.

If you want to create a Word template as a team within Microsoft Teams, Open the Approval app, click Create or Manage templates > New template. After that, select the team for which you’re creating the template and enter a template name.
In this window, you can select a Word from the category drop-down list. If needed, you can add a description, and then you can complete the remainder of the steps as prompted.

Points to be Noted While using Approval Add-Ins
There are some Points to be Noted While using Approval Add-Ins. This allows you to approve requests in MS Word quickly. The following list shows the notable points.
- Only one Approval request can be active at a time in MS Word
- To cancel a request, open it within the Approvals History section and click the Cancel request button.
- You can include additional information in the Comments box above the buttons when rejecting a request.
Need Further Assistance or Have Technical Questions?
Join the LinkedIn Page and Telegram group to get the latest step-by-step guides and news updates. Join our Meetup Page to participate in User group meetings. Also, Join the WhatsApp Community and WhatsApp Channel to get the latest news on Microsoft Technologies. We are there on Reddit as well.

Anoop C Nair is Workplace Technology solution architect with 25+ years (as of 2026) of experience in global enterprise organizations such as JP Morgan, Capgemini, etc. Microsoft Certified Trainer (MCT). Microsoft MVP from 2015 onwards for consecutive 11+ years! He also conducts Intune and modern workplace tech training for enterprise organizations. He is Blogger, Speaker, and Founder of HTMD Community and HTMD Conference. His main focus is on Device Management technologies like Intune, Windows, Cloud PC. He writes about technologies like Intune, SCCM, Windows, Cloud PC, Windows, Entra, Microsoft Security.


Discussion